Meatless meals do not have to be boring!

Part of me doesn’t actually mind being stuck at home. Sheltering-in-home when you live in So Cal and have a pool translates into not a whole lot of suffering.

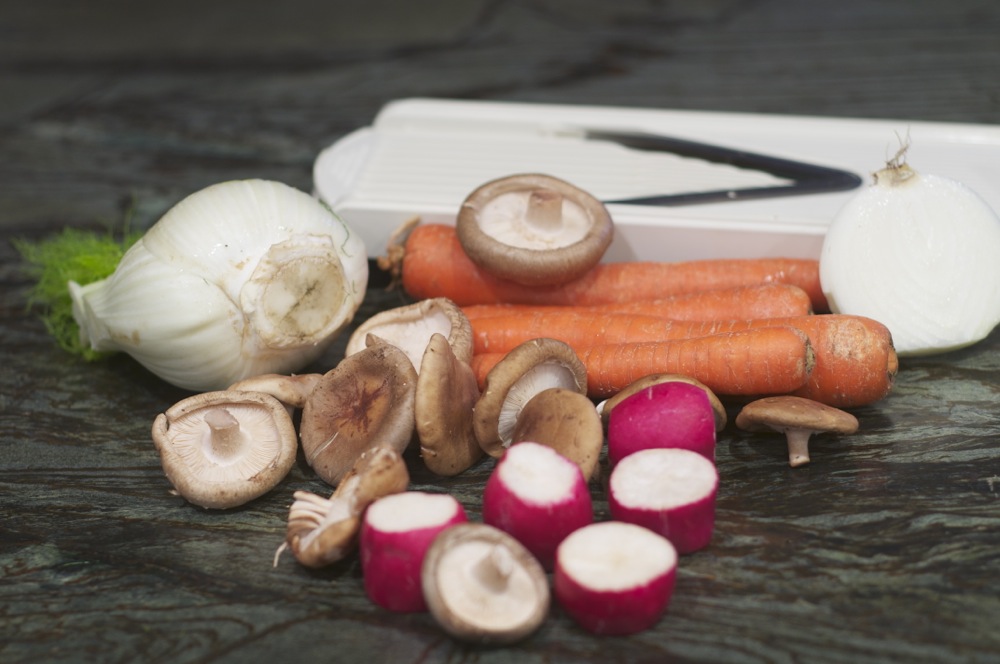
Pre Safer-At-Home mandate it wouldn’t have been unusual for me to make multiple trips to multiple stores to pick up interesting ingredients to strictly follow the recipe du jour, but when grocery store shelves progressively became empty, it was time to go to Plan B. Time to clean out the deep freeze and pantry. I set out on a culinary safari and challenged myself to limiting my grocery store visits to just once a week and getting creative with pantry staples.

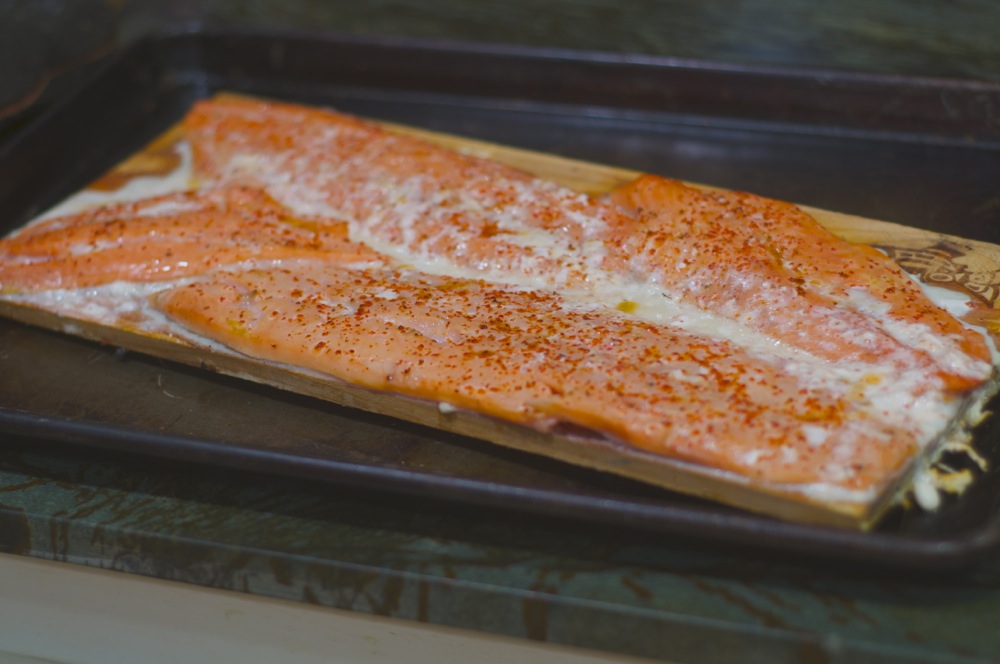
I realize this post promises a meatless meal, but what inspired me to make this dish was finding a cap steak we had purchased last year in the bottom of my deep freeze. I’ve been cooking my way through JJ Johnson and Alexander Smalls “Between Harlem and Heaven: Afro-Asian-American Cooking for Big Nights, Weeknights, and Every Day” cookbook. Man oh man, have these dishes been off-the-charts good. I came across this veggie recipe that could hang with the steak .. their notes say “The secret to this dish is taking market-fresh vegetables, roasting them until they are crisp-tender, and then tossing them in a spicy vinaigrette. Clean eating has never tasted this good.” I AGREE .. so very tasty. 

Roasted mushrooms

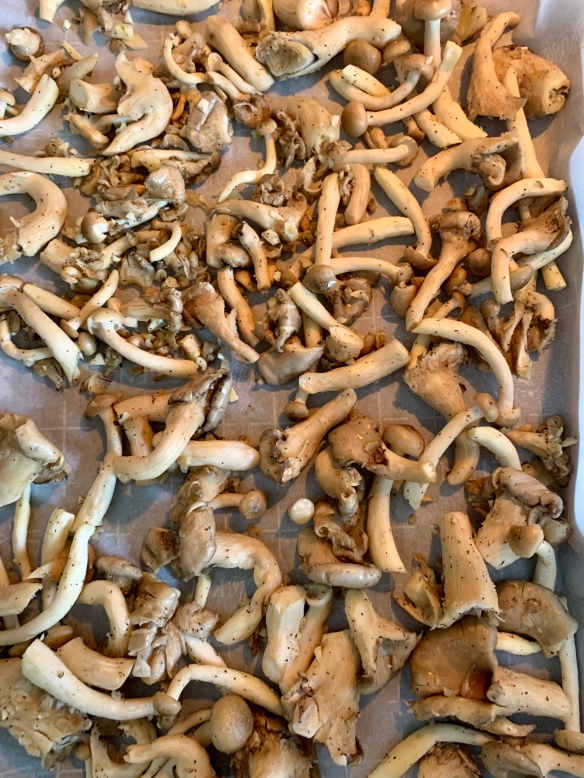
Roast the mushrooms on parchment paper for super easy clean-up.

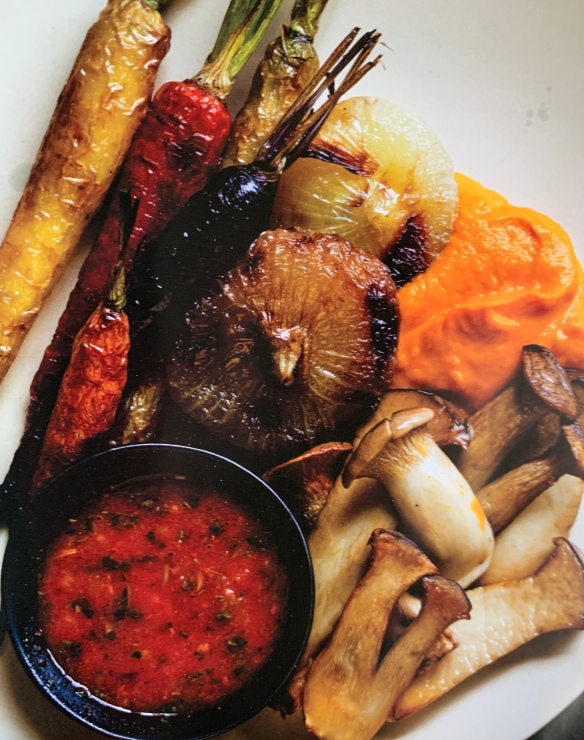
King Mushrooms with Harissa Vinaigrette, Roasted Carrots, Carrot Curry Puree and Cipollini Onions
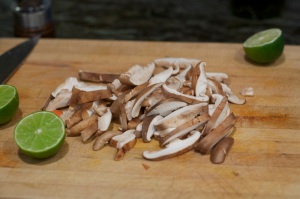
2 pounds king mushrooms, cleaned and left whole (I used an assortment from our local Korean market, H-Mart)
6 cloves garlic, finely chopped
1/4 c olive oil
1 teaspoon kosher salt
1/4 teaspoon freshly ground black pepper
1/4 cup Harissa Vinaigrette (recipe to follow)
Roasted Cipollini Onions (ditto)
Roasted Baby Carrots (double-ditto)
Carrot Curry Puree (doubling down on that ditto)

Preheat the oven to 400 degrees. In a large bowl, toss the mushrooms, garlic, oil, salt and pepper. Arrange in a single layer on a parchment-lined baking sheet. Roast for 15 minutes, flip the mushrooms, and continue roasting for 10-15 minutes, until golden brown and tender. Toss the mushrooms with the vinaigrette while still warm.
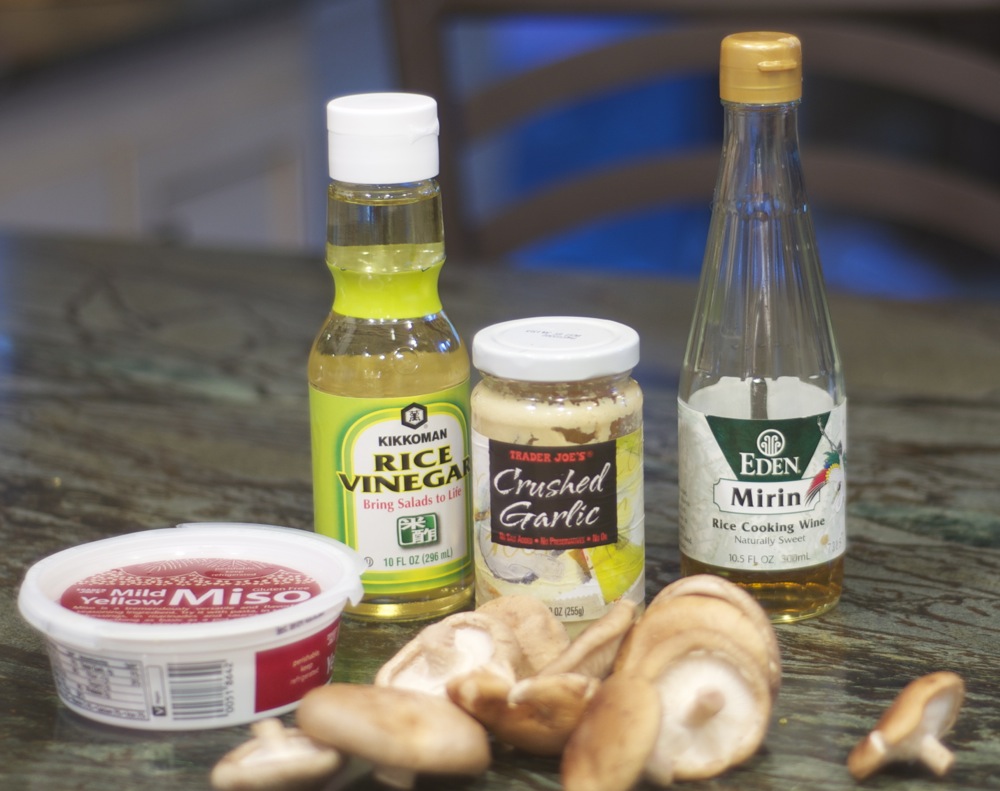
Harissa Vinaigrette

Harissa viniagrette

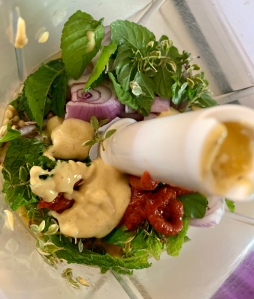
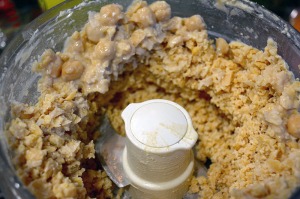
A mini food processor works well for this job.

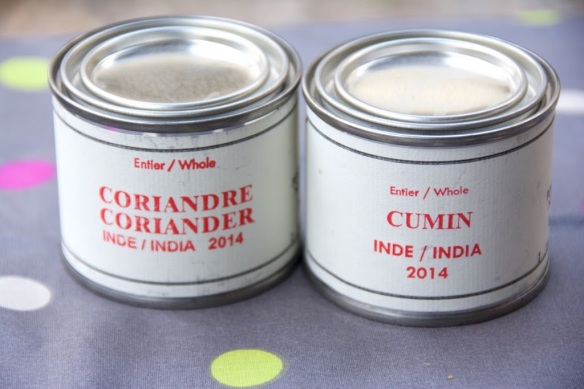
1 1/2 teaspoons cumin seeds
1 1/2 teaspoons coriander seeds
1 shallot, peeled
1/4 cup loosely packed fresh mint leaves
2 teaspoons thyme leaves
1/4 cup champagne vinegar
1 tablespoon harissa paste or red chile paste
1 1/2 teaspoons Dijon mustard
1/2 cup olive oil

In a blender or food processor, grind the cumin and coriander seeds to a fine powder. Add the shallot, mint, thyme, vinegar and harissa and blend until completely smooth. Continue blending and add the mustard. Once combined, slowly pour in the oil until the mixture starts to thicken and emulsify.

Pan-seared cipollini onions

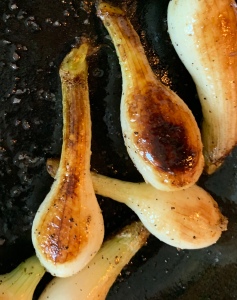
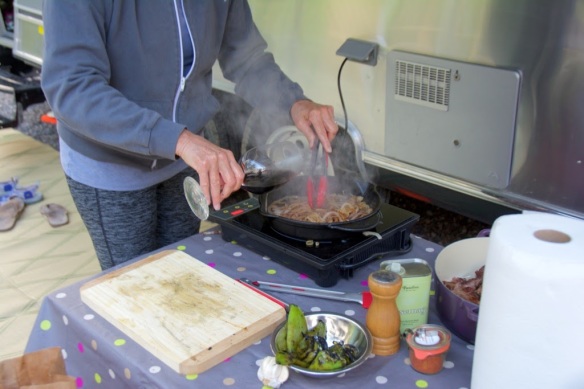
Pan sear the cipollini onions then finish them by roasting in the oven.

Roasted Cipollini Onions
2 tablespoons olive oil
2 pounds whole cipollini onions, peeled and trimmed
1 teaspoon kosher salt
1/2 teaspoon freshly ground black pepper

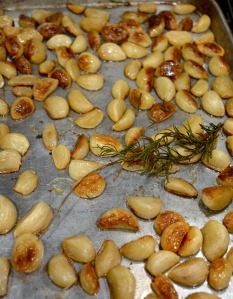
Preheat the oven to 325 degrees. Heat the oil in a large cast-iron skillet over medium heat. Add the onions and stir to coat. Season with the salt and pepper. Transfer to the oven and roast, stirring occasionally, until deeply caramelized and tender, about 30 minutes. 


Roasted carrots

If you can’t find colorful baby carrots, cut the regular ones into bite-sized or long sticks.

Roasted Baby Carrots
1 pound small, colorful carrots, trimmed
1/2 cup olive oil
2 cloves garlic, chopped
1 tablespoon ground cumin
2 teaspoons ground coriander
1 teaspoon kosher salt

Preheat the oven to 500 degrees. Put the carrots in a large bowl and toss with the oil and spices. Arrange in a single layer on a foil- or parchment-lined baking sheet. Roast the carrots until they are tender and the spices are toasted, tossing once, 15 to 20 minutes.

Kathy’s note – the baby carrots I’m talking about are NOT the little stubby ones sold in a plastic bag .. look for small, thin colorful carrots or use normal sized and cut lengthwise and into smaller sticks, if you’d like.

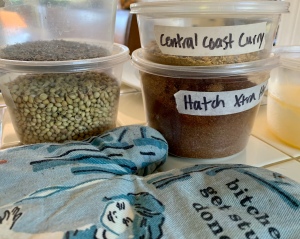
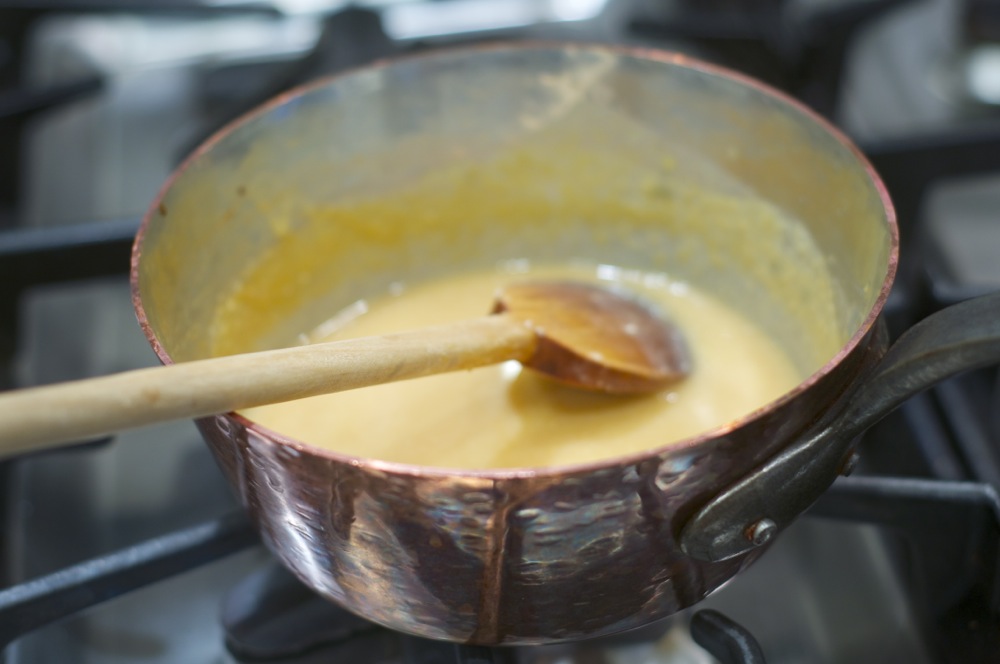
I used central coast curry, a smoky sister to madras, then spiced it up with Hatch extra hot chili powder.

Carrot Curry Puree
1 pound carrots, peeled and chopped
4 cloves garlic, peeled
2 tablespoons olive oil
kosher salt and freshly ground black pepper
2 tablespoons tahini
3 tablespoons fresh lemon juice
1/2 teaspoon ground harissa or chili powder
2 teaspoons curry powder
1 teaspoon ground cumin

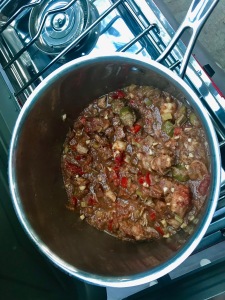
Preheat the oven to 425 degrees. On a baking sheet, toss the carrots and garlic cloves with the oil and a generous sprinkler of salt and pepper. Arrange in an even layer and roast until tender and starting to brown, about 30 minutes, turning to cook evenly. Remove from the oven and let cool. Once the carrots and garlic have cooled to room temperature, put them in the bowl of a food processor with the remaining ingredients. Process until smooth. Taste and adjust the spices as necessary. (Kathy’s note – I wanted a creamier texture so added chicken stock – veggie stock would work if you’re after a vegetarian dish).

One of the shortcuts I used when making this dish was to roast the mushrooms and all of the carrots at the same time so I wouldn’t have to run my oven for an extended period of time (ain’t got time for that!). I adjusted the temp to 400 degrees and increased the time I pan seared the cipollini onions before placing in the oven. Additionally, I roasted the veggies in the morning then warmed them up on a grill mat over a wood fire. This added a hint of smokiness.

I HIGHLY recommend that you invest in this cookbook!  In case you missed it above, Here’s a link so you can buy one today! Typically when I’m following a recipe I pretty much double the spices but no so with this book. The recipes I’ve made thus far have so much flavor and depth, there’s no need. Stay tuned .. more deliciousness to come.

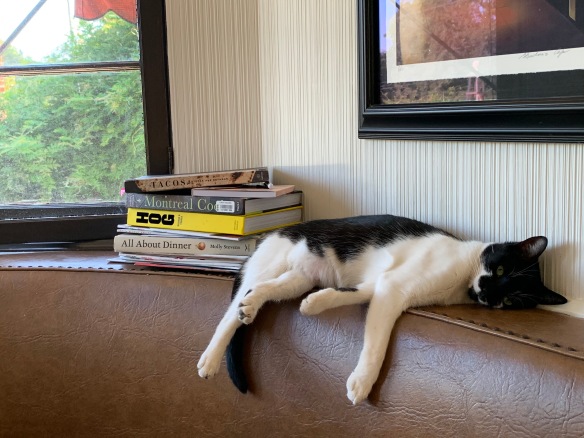
There’s no good reason for this photo other than I think my cat Dali is pretty dang cute!

Lessons from a French chef

The French have a balanced and time-tested relation to food and life. Recently I hosted a cooking demonstration led by a dear Parisian friend, Farida, who has mastered the art of designing menus and preparing classic French dishes. What a lovely afternoon! We sipped champagne, sampled her amazing creations and raised money for a local non-profit, Stars.


At first guests were somewhat reluctant to try the escargot and I get it .. snails were certainly not something I grew up eating! But for the brave foodies who decided to partake, which ended up being everyone, did they ever love ’em! Farida prepared a simple herb butter with parsley and garlic, purchased snails at our local French market Nicole’s, then stuffed the shells. I couldn’t believe how easy they were to make! Once stuffed, she baked for about 20 minutes and oh my, were they ever good. The shells can be re-used, just need a good cleaning in a hot soapy bath.

The fish course was next …

Coquilles St Jacques en croute
(scallops with julienned veggies, cream and pastry)
medium-sized scallops
milk
heavy cream
carrots, leeks, zucchini
puff pastry dough
eggs

Drown the scallops in milk for an hour or so, then rinse and place in the fridge. Julienne the vegetables in thin slices or dices. Cook them separately in a frying pan and then mix together. Add salt, pepper and different spices. Add some cream. Place a bed of julienned vegetables at the bottom of a ramekin. Place a scallop on the vegetables and cut a cross shape in the top of the scallop. Add coarse salt and 1 teaspoon of cream. Put egg yolk on the ramekin rim, then top with puff pastry, piercing the pastry in the middle. Brush the top with egg yolk. Bake at 350 degrees for 15-20 minutes, until the pastry is nice and golden.


Farida selected filet mignon en croute for our main, and it was absolutely delicious. Here’s her recipe.

Filet de Boeuf en croute
beef tenderloin
puff pastry dough
smoked ham slices
mushrooms
white porto
eggs

Sear the filet on all sides, then wrap tightly in saran and place in the fridge for 30 minutes. Cook the mushrooms with 2 glasses of white porto. Take out the juice and grind them into a puree. Roll out the pastry dough on a floured surface. Place a layer of puree, then ham slices, then the filet on top of the pastry. Close the pastry and brush egg yoke. Cook in a 425 degree oven for 15 minutes, then turn oven down to 350 degrees and cook another 30 minutes.

Ratatouille
Farida makes THE BEST ratatouille in the world!  Her secret is to cook each vegetable separately before combining together, then simmering for 30-45 minutes after combined.

2 red peppers
2 green peppers
2 onions
2 eggplants
3 tomatoes
thyme, basil, bay leaf, coriander, herbs de provence

I’m grateful for Farida, her nephew Yannis and my rock star buddy Leslie (who, by the way, just released her very first ALBUM!!) who helped make this happen. This is the first of three cooking demonstrations .. if you’d like to participate and Pasadena isn’t too far of a trek, join us October 20 for a Oaxacan feast! Message me for details or find me at kathygibson.com

Taste of New Orleans on the road

Awesome campground on a river near Nephi, Utah

I’ve never been to Yellowstone!  … until this year!  The hubby and I are on the road, Airstream  in tow, headed to one of America’s gorgeous playgrounds. Since it’s a bit of a drive from L.A., I decided to prep a few dishes and pop in the freezer before hitting the road. Last night we pulled into Ponderosa Uinta campground just outside of Nephi, Utah, and since I had pre-made the gumbo, dinner was super easy. Another benefit of freezing food ahead of time is it helps keep your RV refrigerator/freezer or ice chest cold.

Simple Chicken, Sausage & Shrimp Gumbo

Chicken, Sausage and Shrimp Gumbo
(adapted from myrecipes.com)

6 ounces andouille sausage, chopped
6 ounces shelled shrimp
2 tablespoons butter
2 tablespoons olive oil
1.5 ounces all-purpose flour
8 ounces skinless, boneless chicken thighs, cut into bite-sized pieces
1 cup chopped onion
3/4 cup chopped bell pepper (about 1 medium)
1/2 cup thinly sliced celery
1 tablespoon salt-free cajun / creole seasoning
1/2 teaspoon salt
5 garlic cloves, minced
3 cups chicken stock
1 14.5-ounce can whole tomatoes, drained and crushed
1 cup frozen cut okra
Red rooster or Red Dot hot sauce
3 cups bagged precooked brown rice

Does it get any better?

Heat a Dutch oven over medium-high heat. Add sausage to pan; sauce for 5 minutes, turning to brown on all sides. Remove sausage from pan using a slotted spoon, and drain on paper towels. Melt butter in drippings in pan. Add oil to pan; swirl. Weigh or lightly spoon flour into a dry measuring cup; level with a knife. Stir flour into butter mixture; cook 3 minutes or until flour mixture starts to brown, stirring constantly with a whisk. Add chicken; sauce 4 minutes, stirring frequently. Add onion and next 5 ingredients (through garlic) to pan; sauté for 6 minutes or until vegetables are tender, stirring occasionally. Add stock and tomatoes to pan; bring to a boil. Return sausage to pan; stir in okra. Taste for seasoning, add add Red Rooster or Red Dot hot sauce as desired. Reduce heat, and simmer 6 minutes, stirring occasionally. Serve over rice.

Simple tomato salad, caprese style

We went to extreme measures this year to grow heirloom tomatoes at our house, and for the first time ever, we were successful!  Check out this super-easy salad idea.

Heirloom Tomato Salad

3-4 heirloom tomatoes, sliced in wedges
fresh mozzarella cheese (large balls sliced, or small balls cut in half)
fresh basil
the best olive oil you can get your hands on
ditto for balsamic vinegar

Gently stir tomatoes and mozzarella cheese together. Top with olive oil, a splash of balsamic vinegar, torn basil leaves and freshly ground pepper and coarse salt.

Fine Dining in the Woods

Aluminium Falcon Cookery

Image

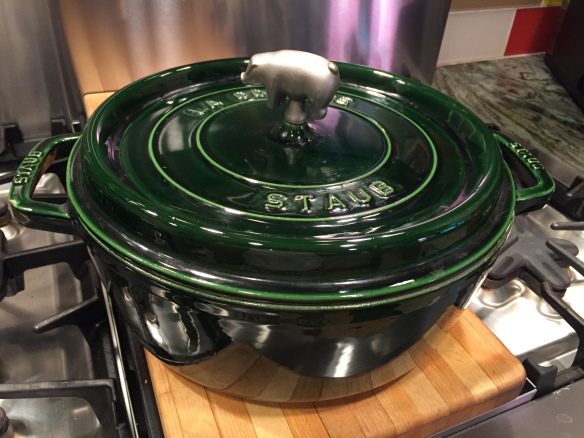
Recently Curt and I became the proud owners of a new Airstream Trailer, which has been a dream for quite some time.  We set out on our maiden voyage, eager to explore the rockies during the peak fall color season. During the welcome to Airstream tour at the dealership, our guide reluctantly showed us how the oven operated, but casually mentioned “no one uses them anyway.”  I took this as a challenge (OK, I admit that I can be competitive at times!) and en route, thumbing through my Molly Stevens braising cookbook, decided to tackle her Bisteces Rancheros (a fancy way of saying Shoulder Steaks Braised with Tomatoes, Potatoes & Poblano Peppers).
This dish is a meal unto itself and needs no accompaniment, but Molly suggests perhaps serving with a Boston lettuce salad with scallions and sliced radishes.

Serves 4-6, braising time about 1 1/2 hours

2 medium poblano peppers (about 8 ounces total)
2 pounds thin-cut (1/2″) boneless chuck or shoulder steaks, cut into 8 or 10 individual steaks
Coarse salt and freshly ground black pepper
4 tablespoons extra-virgin olive oil
1 very large or 2 medium white onions (about 12 ounces total), thinly sliced
2 large garlic cloves
1 tablespoon cumin seeds, toasted and ground
1 tablespoon coriander seeds, toasted and ground
One 28-ounce can whole peeled tomatoes with their juice
1 pound small red or white potatoes, scrubbed
2 tablespoons red wine vinegar

  1. Preheat oven to 325 degrees.
  2. Roasting the peppers: set the poblano peppers directly on a flame to high. Roast, turning with tongs as each side chars, until charred, about 8 minutes total. (If you don’t have a gas burner place under the broiler, turning with tongs until completely blistered. Transfer the peppers to a medium bowl, cover with plastic wrap, let cool until
    enough to handle.
  3. Peeling the peppers: When the peppers are cool, slip off the skins. Avoid the temptation to rinse under the faucet or you will wash away much of their flavor (I use a paper towel to remove.) Slice the peeled peppers open, cut away the stems, remove the seeds. Cut into strips and set aside.
  4. Browning the steaks: Season the steaks with salt and pepper. Heat the oil in a large skillet over medium heat. Add half the steaks and cook, turning once with tongs, until they develop a ruddy brown exterior, about 3 minutes per side. Transfer to a large cazuela or other shallow bowl (I used my dutch oven) and brown the second batch. Add another tablespoon of oil and heat until it shimmers before adding the steaks.
  5. The aromatics and braising liquid: When all the steaks are browned, pour the oil out. If the skillet is blackened, clean it before continuing. Add the remaining 1 tablespoon oil and heat over medium-high heat. When the oil is hot, add the onions, season with salt and pepper, stir, and saute until limp and beginning to brown in spots, about 6 minutes. Add the garlic, cumin, and coriander and cook for another minute. Pour the juice from the tomato can into the skillet. Break up the tomatoes and drop into the skillet.  Season with salt and pepper, stir, and simmer the juices to thicken them a bit, about 4 minutes. Taste for salt and pepper then remove from the heat.
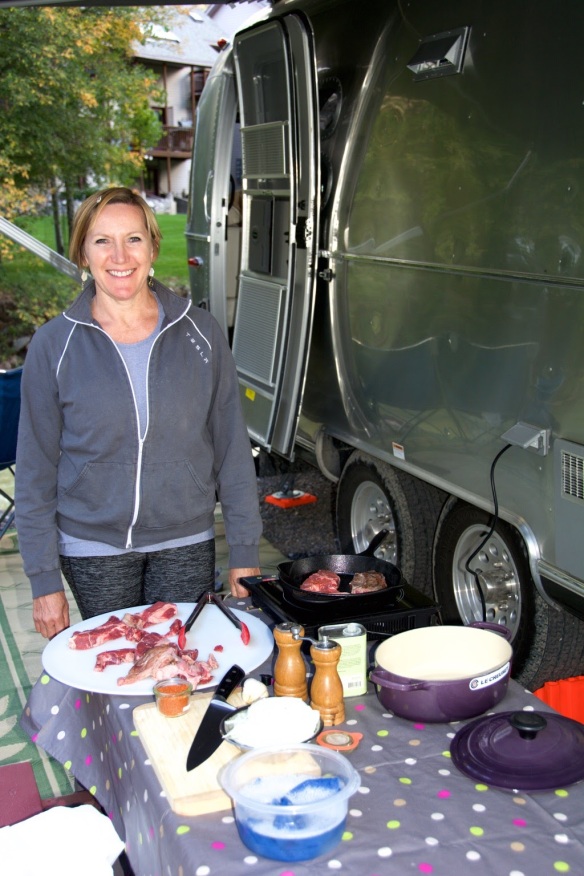
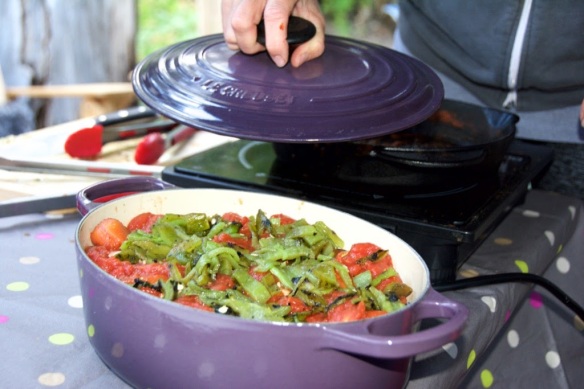
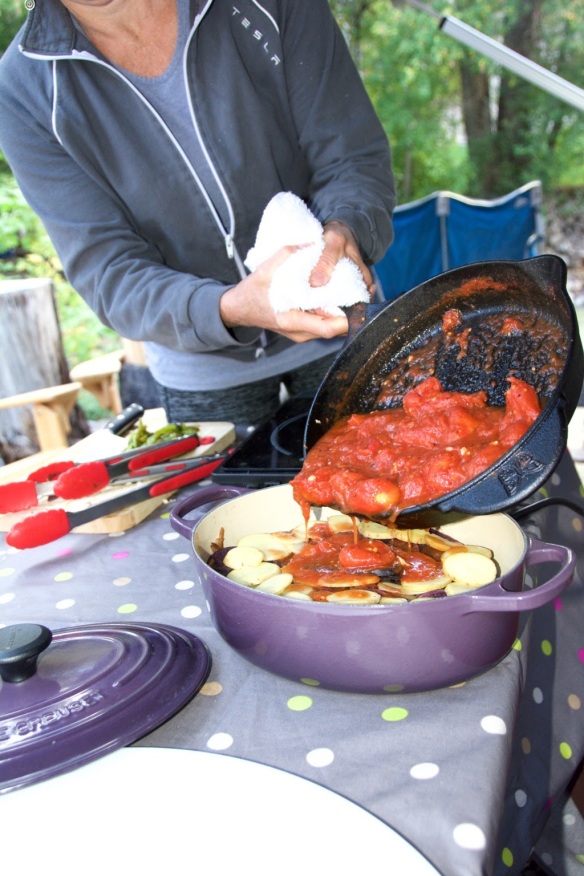
  6. The braise: Slice the potatoes into 1/8″ thick rounds and layer them over the steaks. Stir the vinegar into the tomato sauce and spoon it over the potatoes. Top with the strips of peppers. Cover tightly with heavy-duty foil (or cover with the lid) and slide into the oven. Braise until the steaks and potatoes are fork-tender but not falling apart, about 1 hour.
  7. The finish: Remove the foil, increase the oven temperature to 375 degrees, and braise until the tomato sauce is brown and crusty around the edges. another 20-25 minutes.

So because we were in such high altitude, the braise took over 2 hours!  .. which is why I don’t have a photo of the dish plated .. we were so hungry we just dug in.

I’d highly recommend a visit to Ouray in the fall – it’s absolutely gorgeous!  My mom and dad joined us for a few days and there was plenty of room for us to share meals together in the Airstream.

A must-do if you ever make your way up there?  Stop in at Khristopher’s Culinaire right on Main Street.  The owner knows everything there is to know about brewing coffee, he’s got a huge collection of spices from around the world which are very hard to find, and is just a lovely person to visit with.

Classic Cast Iron

IMG_5117 (1)I’m a huge fan of having the appropriate tools to prepare food. This past weekend I came across an interesting story in the Wall Street Journal about the resurgence of cast iron and copper pots. Non-stick cookware was all the rage during my teenage years, and while a quality non-stick skillet comes in handy when preparing morning eggs, it’s uses are really limited. Check out this link to see my preferred non-stick skillet, and check out this link to see my blog post about copper pots.Ozeri skillet

I recently heard a respected TV chef answer the question “If you were stranded on an island with only one pot or pan, what would it be?” His answer kinda surprised me .. his pot of choice was a dutch oven. After giving it some thought, I totally agree!

Dutch ovenThese super versatile pots are the bees knees when it comes to kitchen tools. The heavy cast iron holds heat like none other, and the enamel makes them easier to clean than a non-stick skillet. The problem with non-stick? The finish cannot tolerate high heat, and at some point it deteriorates and starts peeling off (definitely not something I want to ingest!)

There are so many advantages to cooking with a good quality dutch oven .. here’s just a few:

Fond
You know those browned bits that are left in a skillet after searing meat or vegetables? They are full of flavor and an important element to a good gravy or sauce.

Braise
Molly Stevens taught me so much about techniques of braising. The heavy lid and overall design of a dutch oven make it the ideal choice for slowly cooking meat in liquid, guaranteed to tenderize those cheaper cuts of meat.

Stews
Sautéing aromatics in a dutch oven also creates a flavorful fond, adding significant flavor to any stew. Many recipes suggest “deglazing” your pan, which is simply adding liquid (wine or stock is my preference) to loosen those tasty bits and incorporate them into a sauce.

They’re heavy pots!
Today while browsing in the Le Creuset store, I saw a pot with a glass lid. The saleswoman explained that some shoppers complained that their dutch ovens were too heavy so the company started offering glass lids to make them more manageable. OK people, seriously .. they’re not that heavy! The best way to determine if you should be carrying a full-sized dutch oven is to grab the fat on the back of your arm. If it’s more than you’re happy with, stick to cooking with cast iron dutch ovens. And if you’re happy with what you see, still stick with cast iron to keep it that way!

Cast iron skilletsMy second tool of choice, if I were to be stranded? Without question, it would definitely be a cast iron skillet. I have three, and many times I wish I had more. My 12” iron skillet is my most used kitchen tool, hands down. A seasoned skillet is able to tolerate high heat, and its versatility and uses are endless. It works well on a cooktop, can easily be moved into an oven (frittata! yum!) in the smoker, or even my Santa Maria barbecue. Also, if you’re taking food to a friend’s house, transporting in a cast iron pot or dutch oven really helps hold in the heat.

So seriously, in the past few weeks, I’ve used this skillet for the following:

→ Searing beef chuck for a stew (check out this link for my favorite beef stew recipe, courtesy of Ina Garten)
→ Searing salmon on the cooktop, then transferring to oven to complete (check out this link to my favorite hoisin glazed salmon recipe)
→ Warming tortillas for pulled pork tacos
→ Sautéing aromatics (onion, celery, garlic) on the cooktop then moving to my Santa Maria wood-fired barbecue for a smoky barbecue sauce
→ Searing filet mignon steaks
→ Browning breakfast sausages
→ French toast
→ Stir-fried broccoli with prosciutto
→ Cooking mushrooms on the barbecue
→ Warming our homemade sausage

So, if you haven’t already invested in a heavy cast iron skillet and quality dutch oven, drop everything and go shopping!

Let’s Go Greek!

leg of lambI admit it .. when January rolls around I’m pretty much done with all of the Christmas candies and am ready to get back on the health band wagon.  With a giant carton of peeled garlic cloves left over from my Christmas party cooking (and my farm-girl instinct to never waste food!) I combed the pages of Michael Psilakis‘ cookbook How to Roast a Lamb and decided a healthy Greek feast would be perfect for a dinner party last week.  I appreciate the way Psilakis utilizes fresh herbs .. see if you agree.  Our main course:

Roasted Leg of Lamb
Psilakis says “Butterflying the lamb gives you options that you don’t have with a bone. A good butcher will be happy to do this for you.”

For the stuffing:
1 1/2 cups large, plump sun-dried tomatoes, roughly chopped
1/4 cup oil-cured black olives, pitted
1 teaspoon minced rosemary
Leaves only from 3 small sprigs thyme
1 teaspoon dry Greek oregano
1 tablespoon Dijon mustard
15 cloves garlic confit (I used roasted garlic cloves-see notes below)
3 tablespoons extra-virgin olive oil1 1/2 tablespoons red wine vinegar
About 1 teaspoon cracked black pepper

For the lamb
3 to 3 1/2 pound boneless leg of lamb, butterflied to flatten, some of the fat trimmed off
Kosher salt and cracked black pepper
Extra-virgin olive oil
1 1/2 cup water
1 tablespoon Dijon mustard
1 tablespoon Garlic Puree (or 2-3 cloves garlic confit)
3 large sprigs rosemary
3 tablespoons blended oil (90 percent canola, 10 percent extra-virgin olive)

In a food processor, combine all of the ingredients for the stuffing and puree to a smooth, thick past, about 45 to 60 seconds. Reserve about 2 tablespoons of the stuffing.

Lay the lamb out on a work surface with the fattier side down. Season generously with kosher salt and pepper and spread an even layer of stuffing over it, pressing the stuffing down into the crevices. Drizzle with a little olive oil and roll the lamb up in a spiral, seasoning the fatty side with salt and pepper as you roll. Tie in 3 or 4 places crosswise and 1 or 2 places lengthwise. Ideally, allow the meat to sit on a rack, uncovered, in the refrigerator overnight to dry the surface well and develop all the Greek flavors.

Bring the lamb to room temperature while you preheat the oven to 375 degrees. In a small roasting pan, whisk the reserved stuffing with the water, mustard and garlic puree. Throw in the rosemary sprigs. Place a rack in the pan; the rack should not touch the liquid. Again, season the lamb on all sides very generously with kosher salt and pepper. In a large, heavy skillet, warm the oil over medium-high heat. When the oil is very hot, sear the lamb well on all sides, using tongs and leaning the meat up against the sides of the pan to sear the thinner sides and cut ends. Transfer the lamb to the rack seam-side up and roast for about 1 hour, basting every 15 minutes with the pan liquid. (When the meat is medium rare – 140 degrees – a skewer inserted at the thickest point should feel warm when pressed against your lower lip. Or use a meat thermometer.)

CGG_2278Rest the meat for about 15 minutes. Slice 1/4″ pieces, drizzle with the pan sauce, and finish with a little extra-virgin olive oil.

chick peasWhat Greek meal would be complete without hummus?  I adapted Ina Garten’s recipe by starting with dried chick peas, soaking overnight, then simmering until tender which took about an hour and a half. Canned garbanzo beans can have a high amount of added salt. Hummus is super easy to make .. check this out.tahini


Hummus
recipe courtesy of Ina Garten
4 garlic cloves
2 cups canned chickpeas, drained, liquid reserved
1 1/2 teaspoons kosher salt
1/3 cup tahini (sesame paste)
6 tablespoons freshly squeezed lemon juice (2 lemons)
2 tablespoons water or liquid from the chickpeas
8 dashes hot sauce

hummusTurn on the food processor fitted with the steel blade and drop the garlic down the feed tube; process until minced. Add the rest of the ingredients and process until the hummus is coarsely pureed. Taste for seasoning, and serve chilled or at room temperature.


CGG_2265

What butter is to the French, garlic is to the Greeks.  Here’s how I make garlic puree.  Begin by roasting garlic cloves tossed in olive oil with a rosemary sprig until golden.  When cool, smash with a fork or puree in a mini food processor.  It’s great to have this puree (or the whole garlic cloves) on hand to add flavor to just about anything you are preparing.


Finger-Lickin’ Chicken

BentleyIt’s a lazy Sunday afternoon .. Curt tinkering in his wood shop + Mo our feline and Bentley our St. Bernard napping + breezy spring day = time to light up the smoker!

Check out these birds we found at Whole Foods market .. no growth hormones here! Looks like these chicks were able to walk around and forage to their hearts content. So if I’m gonna light up the smoker and babysit the coals for several hours, I fill that baby up! Also on the menu: rack of baby backs and a few brats.
RibsSmoke & Spice cookbook by Cheryl Alters Jamison and Bill Jamison is my textbook for smoking. Seriously, it’s by far the best book I’ve read about cooking with smoke. Check out this recipe, which is likely the best way of cooking a whole chicken ever invented in America!

Chicken on a Throne

Wild Willy’s Number One-derful Rub
6 tablespoons paprika
2 tablespoons ground black pepper
2 tablespoons salt
2 tablespoons sugarMo
1 tablespoon chili powder
1 tablespoon garlic powder
1 tablespoon onion powder
1 teaspoon cayenne

Injection Liquid
12 ounces beer
1/4 cup oil, preferably canola or corn
1/4 cup cider or white vinegar
2 teaspoons Wild Willy’s rub

Throne Mop (optional)
Smoke & Spice cookbook12 ounces beer
1 cup chicken stock
1/2 cup water
1/4 cup oil, preferably canola or corn
1 tablespoon Wild Willy’s rub

Two 3 1/2-pound whole chickens
Two 12-ounce cans beer (no bottles, please)
1/2 medium onion, chopped
1/4 cup cider or white vinegar
4 garlic cloves, minced
barbecue sauce

Serves 5-6Prepped chickens

The night before you plan to barbecue, combine the rub ingredients in a small bowl. In another bowl, combine the ingredients for the injection liquid. Remove the organs from the cavity of the chickens. With a kitchen syringe, inject about 1/2 cup of the injection liquid deep into the breast and legs of each chicken in several spots. Mopping
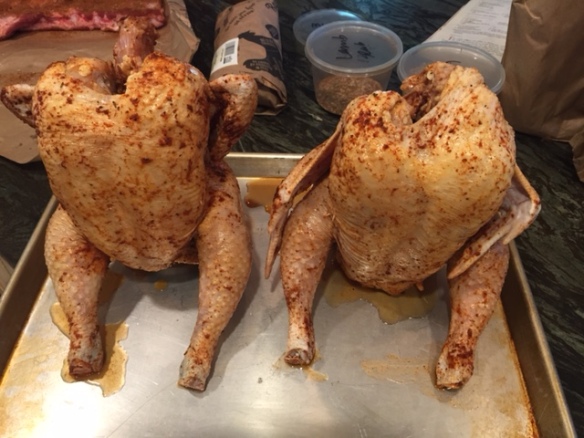
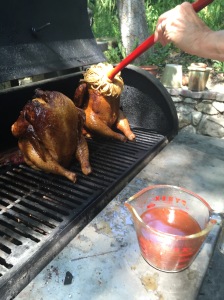
Massage the chickens thoroughly, inside and out, with the remaining injection liquid, working it as far as possible under the skin without tearing the skin. Cover the chickens well with the dry rub, again massaging inside and out, over and under the skin. Place the chickens in a plastic bag and refrigerate them.

Prepare the smoker for barbecuing, bringing the temperature to 200-220 degrees Fahrenheit. Remove chickens from the refrigerator and let them sit at room temp for about 30 minutes. While you wait, open the 2 beer cans and drink half–and only half–of each beer. With a can opener, remove the tops of the half-empty beer cans. Place half of the onion, vinegar, garlic and reserved rub in each can. Insert the replenished beer cans into the cavities of the chickens, balTemperature gaugeancing the birds so they rest upright with their legs bent forward. The cans should sit flat on the grill or on a cooking tray, holding the chickens at attention while their insides are steaming and their outsides are smoking.chimney

If you are going to mop, combine the ingredients in a saucepan and keep the mixture warm over low heat. Transfer the chickens to the smoker. Cook for 3 1/2 to 4 hours, mopping every 30 minutes. When the chickens are done, their legs will move freely and the internal temp should be 180 to 185 degrees.

Let the chickens sit for 5-10 minutes, carve, and serve with BBQ sauce on the side.

Done!

Brezel Pretzel

Alton Brown's homemade soft pretzels

Is there anything better than freshly baked homemade pretzels?

When I was a kid, nearly every summer our family would make the trek from L.A. back to my hometown of Atkinson, Nebraska. We would often stay with Aunt Ruby and our cousins on the farm, but also spent time with Grandpa in town. Now I loved my Grandpa dearly, but as a pre-teen youngster, I was somewhat irritated by being woken in the early morning hours with a radio blaring first the hogs and pigs reports, followed by lively polka music.

Ready for the oven

Ready for the oven

Last night we hosted dinner for a group of dear friends, and I thought it would be fun to re-connect with my German heritage and prepare a Hausmannskost – or Mighty Man Meal! I picked up a gorgeous chuck roast at my favorite meat market, Alexander’s, and prepared Molly Stevens‘ sauerbraten (that’ll be a different post). Curt picked up some amazing German sausages at Schreiner’s in Glendale, and I got to thinking that warm, soft, fresh pretzels would be a perfect accompaniment. (BTW, we cranked the Slacker polka play list while prepping this dinner, and 15 minutes of reminiscing was all I could handle!)

Check out this Alton Brown recipe ..

portioning the doughHomemade Soft Pretzels
Yield: 8

1 1/2 cups warm (110 to 115 degrees F) water
1 tablespoon sugar
2 teaspoons kosher salt
1 package active dry yeast
22 ounces all-purpose flour, approx. 4 1/2 cups

roll out into 24" ropes

roll out into 24″ ropes

2 ounces unsalted butter, melted
Vegetable oil, for pan
10 cups water
2/3 cup baking soda
1 large egg yolk beaten with 1 tablespoon water
pretzel salt (coarse)

Combine water, sugar and salt in the bowl of a stand mixer and sprinkle the yeast on top. allow to sit for 5 minutes or until the mixture begins to foam. Add the flour and butter and, using the dough hook attachment, mix on low speed until well combined. Change to medium speed and knead until the dough is smooth and pulls away from the side of the bowl, approximately 4 to 5 minutes. Remove the dough from the bowl, clean the bowl and then oil it well with vegetable oil. Return the dough to the bowl, cover with plastic wrap and sit in a warm place for approximately 50 to 55 minutes or until the dough has doubled in size.

Preheat the oven to 450 degrees. Line 2 half-sheet pans with parchment paper and lightly brush with the oil. Set aside.

Boil pretzels for 30 seconds

Boil pretzels for 30 seconds

Bring the 10 cups water and baking soda to a rolling boil in an 8-quart saucepan or roasting pan.

In the meantime, turn the dough out onto a slightly oiled work surface and divide into 8 equal pieces. Roll out each piece of dough into a 24-inch rope. Make a U-shape with the rope, holding the ends of the rope, cross them over each other and press onto the bottom of the U in order to form the shape of a pretzel. Place onto the sheet pan.

brush with egg wash

brush with egg wash

Place the pretzels into the boiling water, one by one, for 30 seconds. Remove them from the water using a large flat spatula. Return to the pan, brush the top of each pretzel with the beaten egg yolk mixture and sprinkle with the coarse salt. Bake until dark golden brown in color, approximately 12-14 minutes. Transfer to a cooling rack for at least 5 minutes before serving.

Done!

Done!

Oats+almonds+maple syrup=

Almond GranolaI’m a huge fan of Cook’s Illustrated .. how fun would it be to work in America’s Test Kitchen??!!  Kind of a long story as to how I ultimately became a fan – next time we’re cooking together in my kitchen I’ll share it with you.  Anyhow, my husband and I were hosting his Foundation co-workers for an all-day strategy meeting and I wanted to pull out all the stops with breakfast.  Check out this Cook’s Illustrated recipe for homemade granola.  It was a huge hit, and is super easy to make.

simple ingredientsAlmond Granola with Dried Fruit

Store-bought granola suffers from many shortcomings. It’s often loose and gravelly and/or infuriatingly expensive (right??!!). We wanted to make our own granola at home, with big, satisfying clusters and crisp texture. The secret was to firmly pack the granola mixture into a rimmed baking sheet before bakbase
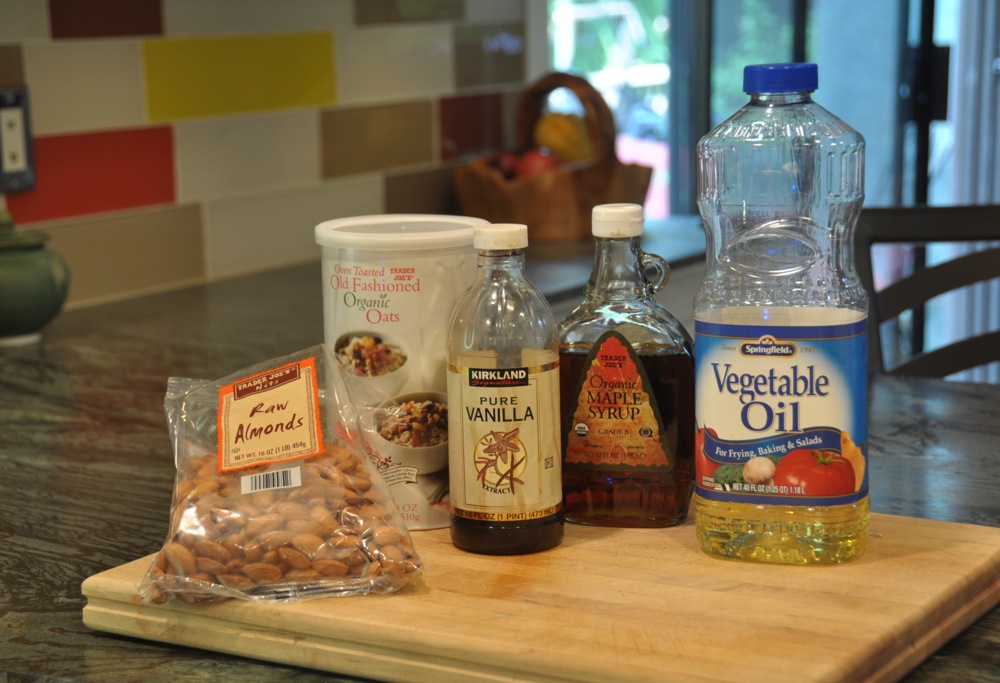
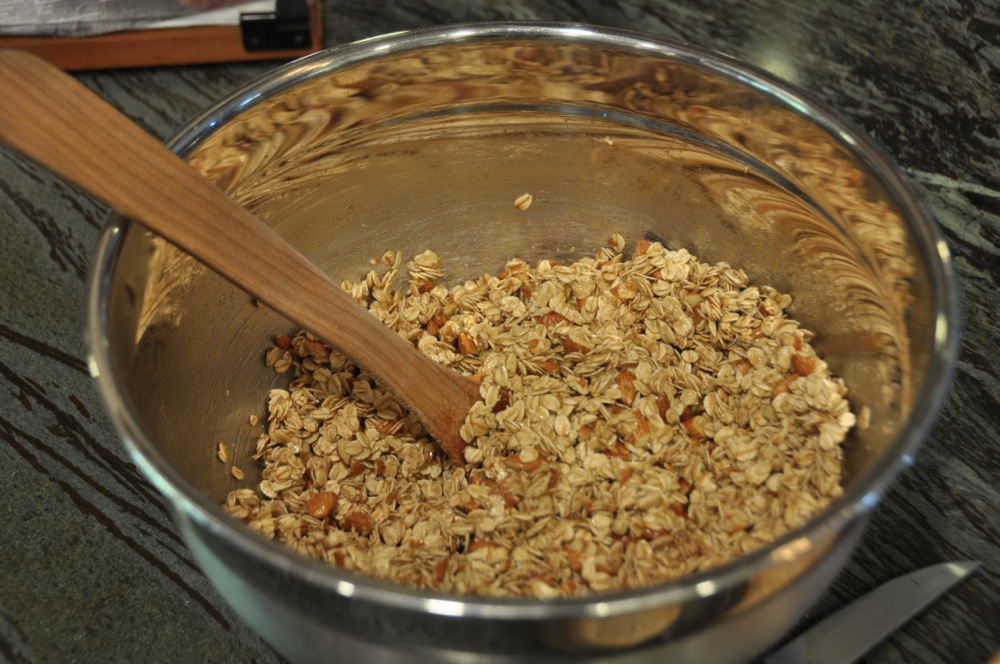
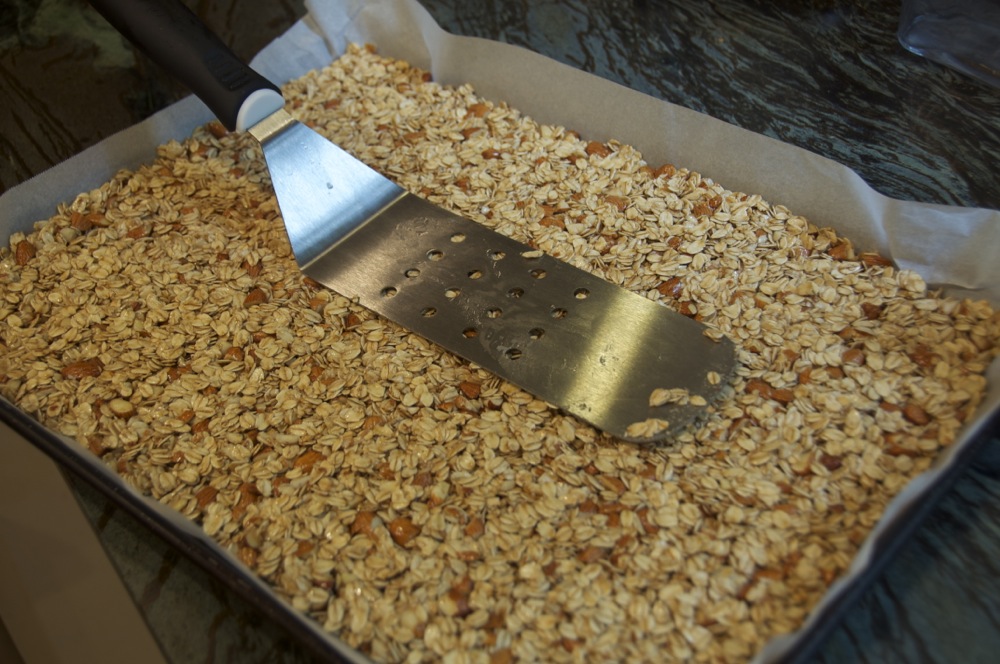
ing. Once it was baked, we had a granola “bark” that we could break into crunchy clumps of any size.  Makes about 9 cups.
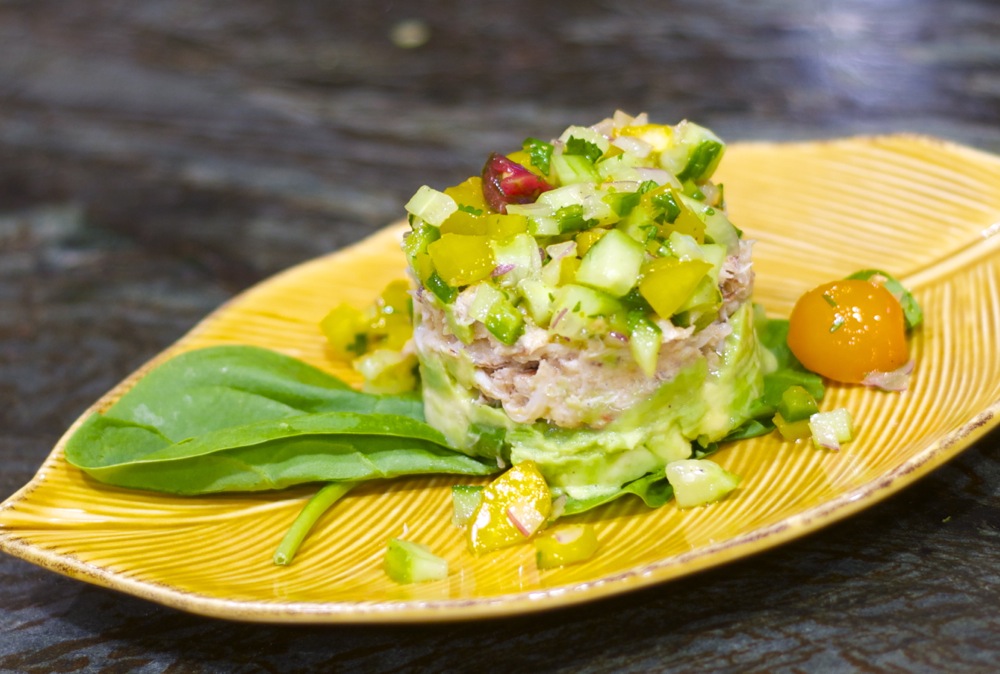
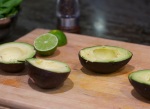
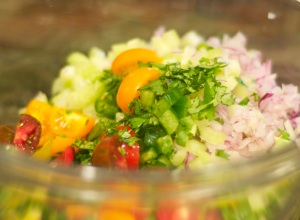
Chopping the almonds by hand is the first choice for superior texture and crunch. If you prefer not to hand chop, substitute an equal quantity of slivered or sliced almonds. (A food processor does a lousy job of chopping whole nuts evenly.) Use a single type of your favorite dried fruit or a combination. Do not use quick oats.

hand-chop almonds

Ingredients
1/3 cup maple syrup 
1/3 cup packed light brown sugar
4 teaspoons vanilla extract
1/2 teaspoon salt
1/2 cup vegetable oil
5 cups old-fashioned rolled oats
2 cups raw almonds, chopped coarse
2 cups raisins or other dried fruit, chopped (I used cranberries, banana chips, dried figs and raisins)

stir togetherAdjust oven rack to upper-middle position and heat oven to 325 degrees. Line rimmed baking sheet with parchment paper.

Whisk maple syrup, brown sugar, vanilla, and salt in large bowl. Whisk in oil. Fold in oats and almonds until thoroughly coated.

Transfer oat mixture to prepared baking sheet and spread across sheet into thin, even layer (about 3/8 inch thick). Using stiff metal spatula, compress oat mixture until very compact.

press firmly in panBake until lightly browned, 40 to 45 minutes, rotating pan once halfway through baking. Remove granola from oven and cool on wire rack to room temperature, about 1 hour. Break cooled granola into pieces of desired size. Stir in dried fruit. Granola can be stored in airtight container for up to 2 weeks.

Crab Towers & Smoked Miso Salmon

Crab TowersI’m always so ready for fall .. glad to say goodbye to long, hot summer days, and welcome the harvest season.  Last weekend I had a few extra avocados perfectly ripened and ready to go, so what to make? My idea of a perfect Sunday night dinner (while watching just one more football game!) .. crab towers and smoked salmon with a healthy stir fry.  Check this out ..

viniagretteCrab Towers with Avocado & Gazpacho Salsas
Serves 6
I found this recipe on Cooks Illustrated a few years back, and have made it numerous times .. super fresh and the flavors work well together. You can prepare the crabmeat salad and gazpacho salsa several hours ahead of serving, but the avocado salsa should be prepared just before assembly.

Crabmeat Salad
3 tablespoons extra virgin olive oil
1 tablespoon champagne vinegar
1 teaspoon grated lemon zest or minced
1/2 teaspoon Dijon mustard
1/2 teaspoon table saltavocado
1/8 teaspoon ground black pepper
2 tablespoons mayonnaise
12 ounces lump crabmeat (or backfin), preferably Atlantic blue crabmeat, carefully picked over for shell fragmentsgazpacho salsa

Gazpacho Salsa
1 yellow bell pepper, cored, seeded, and cut into 1/8-inch pieces (about 1/2 cup)
1 medium plum tomato, cored, seeded, and cut into 1/8-inch pieces (about 1/2 cup)
1/2 small cucumber, peeled if desired, seeded, and cut into 1/8-inch pieces (about 1/2 cup)
1 small rib celery, cut into 1/8-inch pieces (about 1/2 cup)
1/2 small red onion, minced (about 1/4 cup)
1/2 small jalapeño chile, stemmed, seeded, and minced
1 tablespoon minced fresh cilantro leaves
3/4 teaspoon table salt
1/4 teaspoon ground black pepper
2 tablespoons extra-virgin olive oil
1 tablespoon sherry vinegar

avocadoAvocado Salsa
3 avocados (ripe), cut into 1/4-inch dice
1/4 teaspoon ground coriander
1/2 teaspoon table salt
1/2 teaspoon ground black pepper
2 tablespoons lime juice from 1 lime

Garnish
1 cup frisée
2 oranges, peeled using a paring knife and segmented

1. FOR THE CRABMEAT SALAD: Whisk the olive oil, champagne vinegar,
lemon zest, mustard, salt, and pepper together in a small bowl. Measure 3
tablespoons of the vinaigrette into a medium bowl and mix with the
mayonnaise. Add the crabmeat to the mayonnaise mixture and toss to coat.
Cover with plastic wrap and refrigerate until needed. Set the remaining
vinaigrette aside.

2. FOR THE GAZPACHO SALSA: Toss the yellow bell pepper, cucumber,
tomato, celery, red onion, jalapeño, cilantro, salt, pepper, olive oil, and
sherry vinegar in a medium bowl and set aside.

3. FOR THE AVOCADO SALSA: Toss the avocado, coriander, salt, pepper,
and lime juice in a medium bowl and set aside.

building the towers4. TO ASSEMBLE: Place a 3-inch-wide round biscuit cutter in the center of an individual plate. Use a slotted spoon to press 1/3 cup of the Avocado Salsa into the bottom of the cutter using the back of a soup spoon. Lift the cutter off the plate slightly to reveal some but not all of the avocado. Holding the cutter aloft, press 1/3 cup of the Crabmeat Salad evenly into the cutter on top of the avocado. Lift the cutter farther to reveal some but not all of the crab salad. Holding the cutter aloft, use a slotted spoon to press 1/3 cup of the Gazpacho Salsa evenly into the cutter on top of the crab. Gently lift the cutter up and away from the plate to reveal the crab tower. Repeat the procedure five more times with the remaining ingredients.

Miso SalmonThis recipe was on the cover of Food and Wine magazine a few months ago .. really easy to make.  If you have a smoker in your backyard, this recipe can be adapted – just soak a cedar plank in water, place the salmon filets on the plan, and smoke until done.

coalsSmoky Salmon with Miso-Dressed Vegetables

1/4 cup white miso (I used yellow since they sell it at Trader Joe’s)
1/4 cup chicken stock
3 tablespoons mirin
apple wood chips2 tablespoons unseasoned rice vinegar
3/4 teaspoon finely grated peeled ginger
1/4 teaspoon finely grated garlic
2 teaspoons soy sauce
3 tablespoons canola oil
Four 6-ounce skinless center-cut salmon fillets, about 1 inch thick
Kosher salt
Piment d’Espelette
1/4 cup small hardwood chips, such as hickory or applewood
1/4 pound shiitake mushrooms, stems discarded and caps thinly sliced
1/2 small onion, thinly sliced
1/2 small fennel bulb, halved, cored and thinly sliced
4 medium carrots, thinly sliced on the diagonal
4 baby turnips or large radishes, thinly sliced
2 cups lightly packed baby spinach

miso sauceIn a saucepan, cook the miso, chicken stock, mirin, vinegar, ginger and garlic over moderate heat, whisking until hot, 3 minutes. Whisk in the soy sauce and move off the heat.In a large cast-iron skillet, heat 1 tablespoon of the oil. Season the salmon with salt and piment d’Espelette; add to the skillet and cook over high heat, turning once, until lightly browned, 2 minutes total. Transfer to a plate.

miso sauceWorking in a well-ventilated kitchen, wipe out the skillet and add the hardwood chips. Cook the chips over high heat until they start to smoke, 5 minutes. Place a wire rack over the skillet and set the salmon on it. Tent the salmon with a large sheet of heavy-duty foil and smoke for 5 minutes, until the salmon is medium within. Transfer the salmon to a plate. Alternatively, place the salmon on a cedar plank in your smoker and smoke until done (white bubbles will appear).smoked salmon

Meanwhile, in another large skillet, heat the remaining 2 tablespoons of oil. Add the shiitake and onion andshiitake mushrooms 
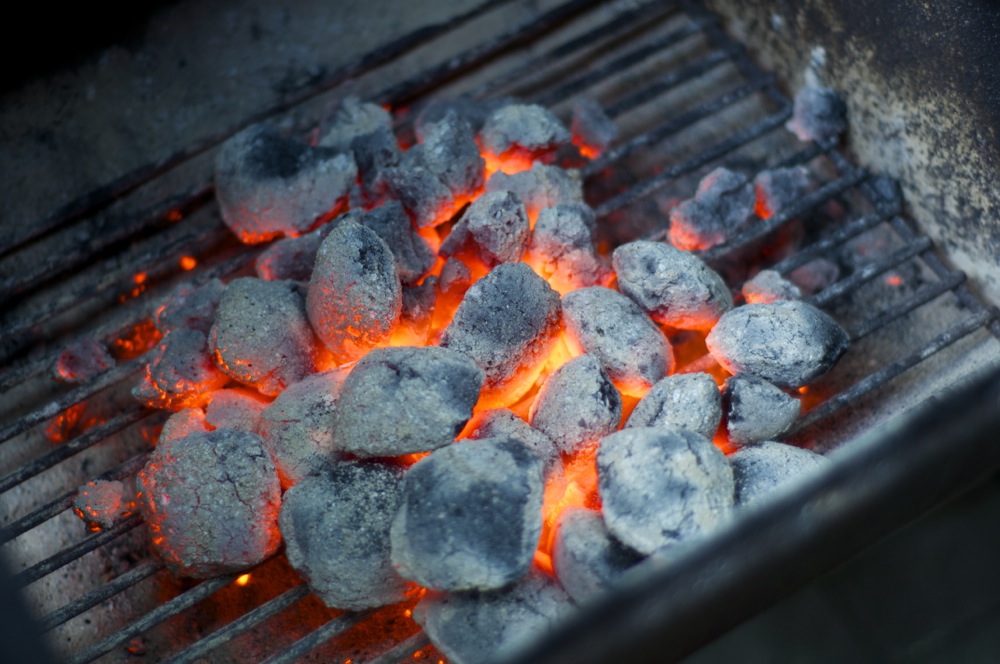
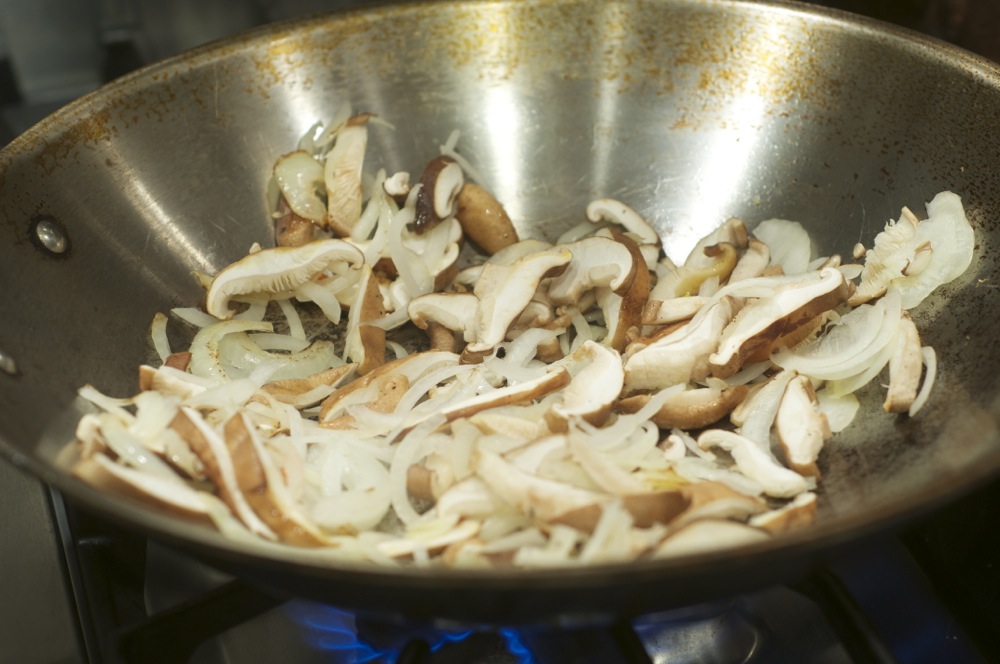
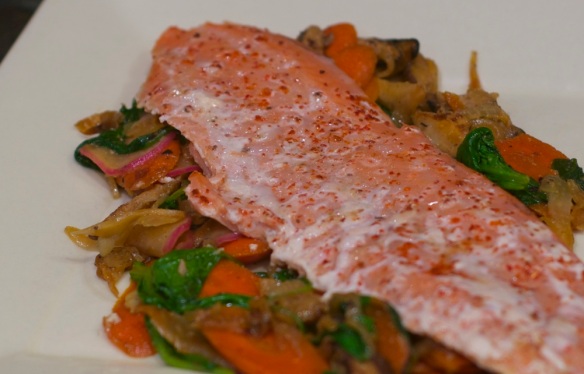
cook over moderately high heat, tossing, until browned in spots and just starting to soften, 4 minutes. Add the fennel and carrots and cook, tossing, until crisp-tender, 2 minutes. Add the turnips and spinach and cook, tossing, until the spinach is just wilted, 1 minute. veggiesSeason with salt and sprinkle lightly with piment d’Espelette; add 1 tablespoon of the miso dressing and toss well. Transfer to plates. Flake the salmon, scatter it over the salad and serve, passing the remaining dressing at the table.

stir fryNotes Piment d’Espelette, a mildly spicy red pepper, is available at specialty food shops and lepicerie.com.